I’m looking at all the things we can do with slow cookers, or as we call them, crock pots, and I have to say that I am amazed. In all the years I’ve thought about different ways to make yogurt (or is it yoghurt?) I never came across the idea of using a crock pot. Until recently… And it’s a genius of an idea!

Yogurt (I’m sticking with this spelling) is one of the dairy products most of us just mindlessly buy at the store when it is easy to make and cheap to make at home. It’s great when stretching a tight budget to save a few bucks by making it yourself, especially when your kids eat a lot of it.
Dairy products, like yogurt, taste best and are most nourishing when made from whole fresh milk. Today, finding that high quality milk is next to impossible. The next best options are whole non-homogenized milk and there are sources around for that but it is more expensive than regular store-bought whole milk. Therefore, we are going to use regular whole milk for our recipes. If you buy non-homogenized, so much the better, the recipe is the same. I don’t personally recognize skim milk yogurt as edible. I’m old school, what can I say?
Ingredients for Yogurt
Whole milk (the least pasteurized and homogenized the better)
Yogurt containing live culture (it’ll say so on the carton)
Steps to Make Yogurt in the Crock Pot
Pour the milk into the clean crock pot. The amount can range from a quart to a gallon, but the process is the same, so let your family’s batch size determine the amount of milk.
Turn the heat to high and using a good kitchen thermometer, carefully watch the milk until the temperature reaches 180 degrees Fahrenheit. Plan on an hour, maybe two hours to reach this temperature. Don’t let it get hotter and boil. Once you know how long your crock pot takes to heat up cold milk to 180 degrees you can make a note of it.
Don’t skip the ‘heat up to 180 degrees’ part – this sterilizes the process by killing undesired bacteria that may be waiting to be cultured along with the good, desirable yogurt cultures.
At 180 degrees, turn the crock pot off and let it sit until the temperature reaches 115 degrees. A good kitchen thermometer is critical for making yogurt. 110-120 degrees is good for adding the culture; 115 degrees is perfect. You can estimate the cool-down period at around 2 hours. Here again, check it often. You want to hit the 110-120 degree window.
Cooled down milk may have a skim across the top – if it does, remove it. It’ll be too tough (don’t worry if you forget though – it’s just milk protein) to be included in the final yogurt.
When the temperature is right, add approximately 1/4 cup of active cultured yogurt to the mix. Stir gently but do mix it very well so the yogurt culture is well mixed into the warm milk.
Yogurt Culturing
Now for the tricky part: You have to keep this yogurt batch’s temperature stable for the next 7 to 12 hours.
Option 1: Keep the yogurt in the crock pot warm by covering it with a thick cloth, a blanket or towel, turning on the thermometer to low for just a few minutes every 3 hours or so. Keep the crock pot in the off position except for about 10 to 15 minutes every 3 hours. This process should take about 7 to 8 hours to finish. Again, watch your first batch carefully, then you’ll know how to regulate future batches.
Option 2: Keep the crock pot lid on and place the yogurt and crock pot container inside your oven. Turn on the oven’s light but no heat. This process takes about 12 hours minimum to culture and sometimes can take up to 24 hours.
Option 3: Place the crock pot and yogurt into an insulated cooler, place thick towel or blanket around to insulate it. Check the temperature about 3 hours into the culturing and, if necessary to keep the temperature between 110 and 120. plug in the crock pot, put it on low for about 10 minutes. Unplug and recover. In 3 more hours, check again.
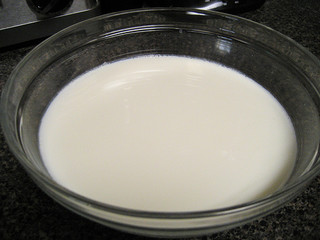
The process of keeping the culturing process temperature stable is not flawless and involves some work but these 3 options seem to offer the best methods to culture large batches with minimum work. When the yogurt making is complete and you have the desired thick yogurt, spoon it out into containers you can refrigerate, or keep it in one big tub for scooping out like I do.
Different Yogurt Varieties:
- Greek Yogurt: You can go a step further with your yogurt and make Greek yogurt. Just take a piece of cheesecloth laid in a colander, pour the yogurt into the cheesecloth and let it drain out the whey for an hour or so. Spoon this thick yogurt into containers and refrigerate.
- Casual Crock-Pot Yogurt: Making yogurt can be pretty forgiving, so don’t worry if your yogurt doesn’t turn out perfect. I’ve made it so many times that at this point, all I do is throw in the milk, crank the crock pot up to high for a few hours, turn it off for a few hours, stir in my leftover yogurt from the last batch, and then wrap the whole pot up in beach towels overnight.
- Flavored Yogurt: Stir in fruit or flavorings to make your family favorites, without all the additives!
Yogurt is a basic necessity to many kitchens. It is in mine. I’m sure you love it, too. The crock pot method promises to be a way to make large batches of yogurt without using the little yogurt makers and with minimum fuss and mess.
I love the crock pot idea. I’m always amazed at how many uses people can find for a crock pot! My crock pot isn’t so hot. I do it the way my mom did… place in glass jars, set them on a heating pad on low, cover with a large towel, and let sit 8-12 hours. Then refrigerate.
My son is lactose intolerant andd LOVES yogurt. Sadly, it makes him very sick! He loves drinking lactose-free milk, I am thinking of making this recipe for him with lactose-free milk. Do you know how crock-pot yogurt comes out with lactose-free milk instead of regular, lactose milk?
Kristen,
I don’t know but think it should work out just like regular milk as I don’t think the lactose has anything to do with the yogurt-making process, but I could be wrong. We would love to hear how the yogurt comes out so please let us know!
Interesting fact. People that are lactose intolerant can drink raw milk without being bothered at all because the bacteria they need to digest it has not been killed off my processing. That being said if you use raw milk to make yogurt do not let it heat to 180 you only heat to 105-110 that way the things you want alive stay alive. Other than that the process is the same. I have not made the yogurt yet, but have researched it a lot and my mother in law has made it many many times.
Yes, I have seen this. My daughter (who is nursing) couldn’t handle me drinking Pasteurized organic milk. She would scream and scream all day. I stopped drinking it and she was happy and I started feeling sane again! We drive 2 hours away to get raw milk and she has no problem with me drinking that. She’s as happy as can be and now I’m getting my calcium for sure!
Here here to raw milk! I was going to suggest that myself. Another option is goats milk,
make sure you get a raw source though. More information at westonaprice.org
Kristen, use RAW whole milk. There is no better milk then RAW. Many lactose intolerant people feel great drinking raw milk. If I don’t have time to make homemade yogurt, I but yogurt made from raw milk ONLY, as well as we drink raw milk, and none of this cooked processed milk that barely has any valuable nutrients left.
I grew up on raw milk, my son grew up drinking STRICTLY raw milk, all cheese/yogurt/kefir is raw only in my house. We are never sick, no allergies, my son had cold only ONE time in kindergarten. We eat RAW honey, not the liquid, heated supermarket kind without any vitmanis in it, as well as other products I buy all organic food and as raw as possible.
What’s your recipe for cheese?
When you cook the yogurt for 24 hours or more, at a steady temperature of 100-110 degrees, the bacteria “eat” all of the lactose, making the yogurt lactose free. Using lactose-free milk to make yogurt won’t come out right. Also, letting the yogurt ferment longer gives it more probiotics! I agree with the commenters above, use raw whole milk for the best results!
I did it once but it didnt get the desired thickness… Pherhaps You could try.
After the milk has cooled to 115 and you mix in the live cultured yogurt………….. Then what?
Refrigerate? Let it cool down more before refrigerating? Does it help any to add powdered milk to the whole milk? Does it matter if the cultured yogurt is flavored? I used flavored Activia light. Thank you for responses!
Hi, Betsy! Click for page two to get the rest of the article – once you’ve mixed in the live yogurt, put the lid of your crockpot back on, and swaddle the whole thing in towels to keep it at a stable temp as the yogurt cultures. :) Don’t refrigerate until it’s all done – adding powdered milk isn’t necessary, some people put in a little (soaked and dissolved) gelatin to make the finished product firmer, but I like it just as it is naturally. I’m sure the flavored Active will be just fine. :)
Sorry if this is a silly question, but would the “keep warm” setting on the crock pot be too hot do you think?
You mean for the bundled-up let-the-yogurt-culture phase? I think so – Keep warm’s hot enough to cook stuff so I think it’d be too much for the bacteria..
Do you think it would be possible to just open up a probiotic capsule and pour it into the mixture instead of using the active yogurt culture? Would that basically be the same thing as those yogurt starters are made of? Thanks.