
One of the most popular herbs in my kitchen has to be chives. This relative of the onion has been used as a food for about 5,000 years in Asia, but chives didn’t catch on in the West until the 1500s. Today, we use chives mostly in creamed dishes and soups, when making sauces, and especially with potatoes – how bland is a baked potato without chives?
If you’re tired of buying chives and using the less-flavorful freeze-dried chives from your spice rack, why not keep a pot of chives growing in your kitchen? Chives are easy to grow from seed, and once you have some growing in your garden, you can divide clumps of them in the spring or fall to create even more plants.
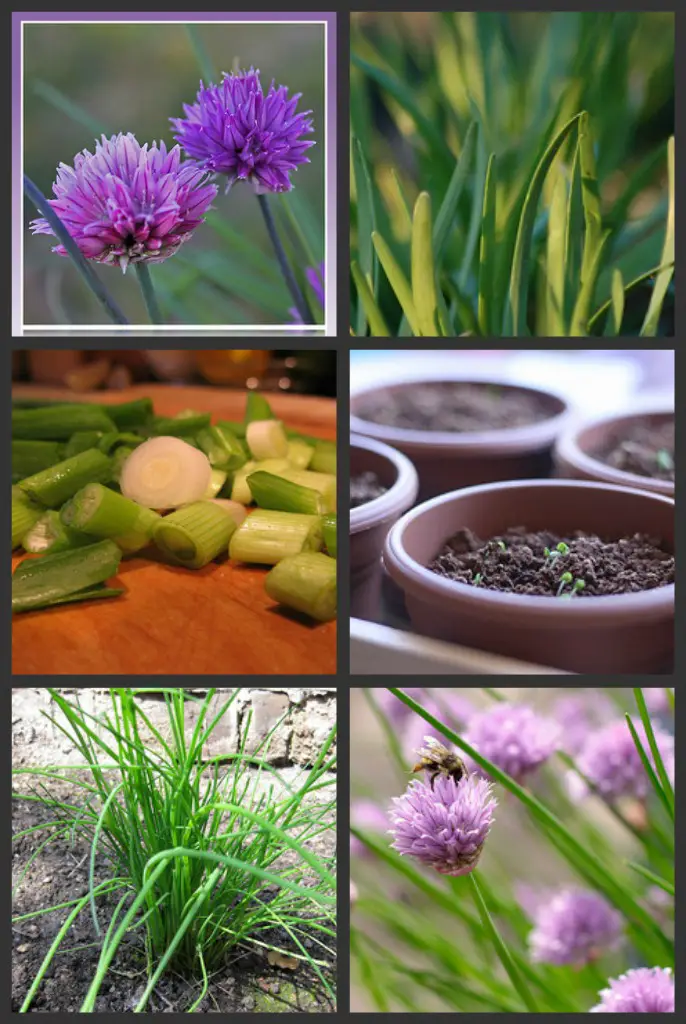
How Many Chives Do I Need?
To calculate how many chives you need to grow for your family, figure that each person you cook for will require between one and two clumps of mature chives. Each seed produces one seedling which will start growing additional bulbs when it reaches maturity, and will soon produce a clump of chives. Chives are a very hardy plant; easy to grow indoors or outside, as long as they get the right balance of soil, water, temperature, fertilizer, and sunlight. Whether inside or outside, chives prefer a pH of 6.0 to 7.0.
Planting Chive Seeds
Use a small pointed twig or similar object to push a hole into the soil about 1/4″ and space these holes out by 8-12 inches. Place one seed in each hole, and gently but firmly press down with your fingers so that the soil packs around the seed, displacing any air. Finally, water the area gently so that rushing water doesn’t wash your seeds out of the ground. Until the seedlings emerge, check the soil daily and make sure the seed’s little home stays moist. When the dirt over your seed starts to dry, water it again. You want the seeds to have access to water, so make sure and wet the soil down at least one inch.
When seedlings emerge, make sure that you water them every 5 to 7 days, depending on your climate, and you want to soak the soil several inches down so that the roots are all moistened. Water the chives regularly until they are fully grown. Well established, mature chives survive fine in drier soils but watch the tips to see if they are drying and turning brown indicating the need for better watering. Only after seedlings are firmly established, fertilize with a heavy nitrogen fertilizer – this is usually best in late spring and again in mid to late summer.
Planting Chives Outdoors
Whether you start your seeds outdoors, or start indoors and then move the chive seedlings into your garden, you need to make sure that you choose the best location for your baby chives. Try to find some sandy loam that is rich in organic matter for an outdoor chive garden. The area should receive good sunlight for six to eight hours per day, and it should drain well – being neither too wet or too dry. Prepare a bed about eight to ten inches deep, tilling in composted manure or other well-rotted material as well as any time-released fertilizer you plan on using and removing rocks, roots and other non-soil material. It sounds like a lot to do, but proper preparation of the seedbed really makes a difference in the quality, health, and vigor of the plants.
Want to learn more about herbs? We recommend [sc:HerbalAcad ].
Harvesting Chives
Chives are mature and ready to harvest within three months of starting the seeds. You can also leave the chives in the ground, and snip the tops as you need them in cooking. If you are cutting from growing plants, cut them back all the way, leaving only an inch or so of green, and watch the plants regrow the leaves. Chives are very vigorous and thrive despite the trimming – especially so when you’ve taken the time and effort to properly prepare the soil, provide all the nutrients and assure adequate water.
Let the chive plantings begin! And don’t forget that you can eat the beautiful chive flower as well as the green leafy materials. How cool is that!
Have you ever grown chives?
Chives are my favorite herb. Once the plant is established it requires little care. I love how they are the first to push their way up through the soil in the spring.