If you want to save a huge amount of money at the grocery store, try making your own yogurt. Homemade yogurt is much less expensive than yogurts purchased from the grocery store, and are usually 100 times better for you. Store-bought yogurts often have many chemical additives mixed in to improve the shelf life of the yogurt, or to change the texture or taste. When you make your own yogurt, you can avoid these unwanted ingredients while you save money! A win-win if I’ve ever seen one.
Before you start making your own homemade yogurt, you must choose a bacterial culture starter. The bacteria and cultures in the yogurt starter firm the milk, and give yogurt its familiar taste and consistency. There are two kinds of yogurt culture bases: thermophilic and mesophilic. Thermophilic cultures require a warm temperature to develop, while mesophilic cultures can develop at room temperature.
Thermophilic Yogurt Cultures
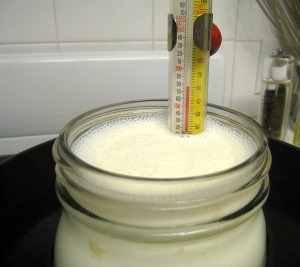
Most store-bought yogurt is made with the thermophilic form of cultures. Warmer temperatures reduce the growth of unwanted bacteria, and thermophilic cultures also develop faster. Most thermophilic yogurt cultures require a temperature between 105 and 115 degrees Fahrenheit to develop. It takes between 4 and 12 hours for a thermophilic yogurt culture to solidify. You can either buy a yogurt culture (Amazon) by itself, or just purchase a container of plain yogurt, and use those cultures.
Mesophilic Yogurt Cultures
Mesophilic yogurt cultures develop at room temperature, and this form of preparation results in a runnier texture. Preparing mesophilic cultures is easier for home-based yogurt production because it does not require the use of heat or yogurt makers to produce, but mesophilic yogurt takes about twice as long as thermophilic yogurt to develop – it usually takes between 12 and 24 hours for the yogurt to reach the desired consistency when you’re making yogurt between 70 and 78 degrees Fahrenheit! 12 to 24 hours? Talk about set it and forget it!
Choosing the Best Yogurt Culture
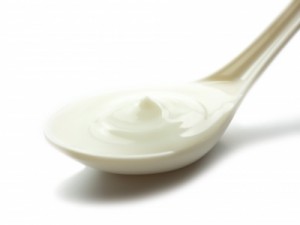
There are few other distinctions between the two forms of yogurt. If you prefer thicker-texture yogurt, or Greek-style yogurt, then thermophilic starters are probably your best option. If you prefer ease of preparation and runnier yogurt, (or just use it for smoothies or frozen yogurt) then you will be happy with the mesophilic cultures. Thermophilic cultures result in thick, creamy, and smooth yogurts, while mesophilic cultures can produce thinner consistencies that can have a texture similar to that of jelly.
Whether you choose thermophilic or mesophilic cultures when making your own homemade yogurt, you will end up with a quality product free from unwanted ingredients at a reduced cost. With a good yogurt base, you can add in many different flavorings and fruit to create endless varieties of beneficial yogurt.
I guess I’ve always made Thermophilic yogurt. :-) I let mine set overnight on the heating pad on low, covered by a big thick towel. Mine gets really thick.
I want to buy more of thermophilic yogurt culture. How can I get it?
I am able to get thermophilic at the local co-op but you can also get it through the internet
You can find it online – here’s the kind I use: https://www.amazon.com/gp/product/B001GVIS4M/ref=as_li_ss_tl?ie=UTF8&tag=mompre-20&linkCode=as2&camp=1789&creative=390957&creativeASIN=B001GVIS4M
Or else you can just buy a container of plain yogurt and use that as your culture!
Thermophilic cultures are dead after 140°; they certainly do not require 150-180°! Thermophilic yogurt is usually cultured between 100-115°F, though some people heat treat the milk first, before adding the culture once it cools enough. Add the culture at 150° and higher, and you won’t get yogurt.
I must have accidentally entered in the wrong temperature range. I’ve fixed it now. :-)
Not quite fixed: your article lists the range as topping out at 1115 degrees. I think that includes an extra “1”.
Wow! Thanks for catching that. Fixed. :)
Heating milk to denature the protein is a bit of a hassle. So I use powdered milk. Pour boiling water into a big saucepan, and whisk in the recommend amount of powdered milk plus a bit more for extra thickness and cover with a towel to cool down slowly. After 1/2 hour, into a sink full of cold water with the pan to cool it to 40C and then add culture.
I put the mix into 1 litre take away containers, then put 4 of them into the electric frypan as a water bath over night. The result is nice and thick, and you can turn a 1 litre container upside down with out the lid on :-)
I do cheat a little, I made a more accurate thermostat control for the frypan, using an Arduino – just because I can. If you are not a geek, get a cheap frypan from a junk shop, play around with the control till you make great yogurt, then silicon the control knob so it will never move again.
Love the fry pan idea!
For the incubation phase, I just put the lidded pot inside my oven with the light on. The heat from the bulb is enough to make my yogurt set. Here is how to test your oven to see if it will work for you. Before bed, turn the light on in your oven and place an oven safe thermometer inside. When you wake in the morning, check the temperature. If you find that your oven stays at about 90F, you have the perfect place for your yogurt to set up. So you don’t have to wait for the bulb to heat the oven, Just be sure to warm the oven slightly by turning it on, then when it reaches about 100F, turn it off but leave the light on. Now you can just slip the pot inside and forget about it until morning.
I just set my oven at 110 degrees put my quart jars if yogurt in with lids loosely on them and about 7 hours later yogurt
Just found your blog, it’s great!
My favorite method is with an Excalibur type dehydrator set @ 125º for an hour and then reduced to 105º till set. If process has not set before going to bed, I turn off dehydrator and leave in (covered with heavy towels) till morning. Always perfect. The high start temp is because it is a fairly large dehydrator and needs to warm air space before reducing temp.
Also, I use Le Parfait wire bail canning jars which have exceptionally tight seals. As the yogurt bacteria feed, they exhaust the O2 and pull the wire bail extremely tight. Because it is then, airtight, I’ve kept it for as long as 5 months without the slightest ill effects. Sitting for that length, it might become slightly tarter, but that’s it. Believe it or not, even though it sits this length of time, the starter is still alive because it has not been exposed to O2. Of course this is predicated upon NOT opening the jar until ready to use because once it is opened, it is exposed to air, and the air in the jar cannot be exhausted. That said, I still prefer to use FRESH starter as a culture to ensure success.
One rule I have about making both buttermilk and yogurt: the container of dairy product to be used for starter must never be unsealed until the moment in which it is to be used for starter. The O2 rapidly begins to degrade the product. Therefore, I NEVER use opened containers of either yogurt or buttermilk to use as starter.
it’s 108 here in tucson…can i simply put the goats milk in a crockpot with starter cultures and leave it outside all day? (i’ll watch for uninvited guests, LOL) sun tea takes less than an hour!
How long does the yogurt last in the fridge?
Is it ok to freeze the mesophilic culture,and how do I reuse it
Is it okay to use the plain yoghurt in non-dairy yoghurt production? for example, i want to produce coconut milk yoghurt using plain yoghurt. do the yoghurt can be set? Thank you
…. when I lived in south central Turkey noticed the peasants with large crocks outside their door. They were making yogurt. It was delicious.
I make 2 two quart batches a week, put it in my oven on bread proof for 12 hours…oh, also add half a cup of powdered milk and one scoop of powdered goat’s milk after I warm the milk to (180) and when adding the starter (110 degrees), with 6 tablespoons of my previous batch per batch. Tart and thick. Delish.
I was wondering if the Mesophilic Yogurt Cultures could be used when making non-dairy yogurts (such as soy milk, almond milk, oat milk or coconut milk) instead of regular dairy milk